Meet Pat

Video (Meet Pat) -

Wednesday, February 23, 2011

Think Spring!

 I don’t know about you, but I am SO done with this winter . . .  so I am thinking butterflies. I like to make realistc looking butterflies. I don’t use a pattern for those, I just look at the pictures in the Audubon book and try to duplicate the look with quilling,, but I also make “fun’ butterflies.

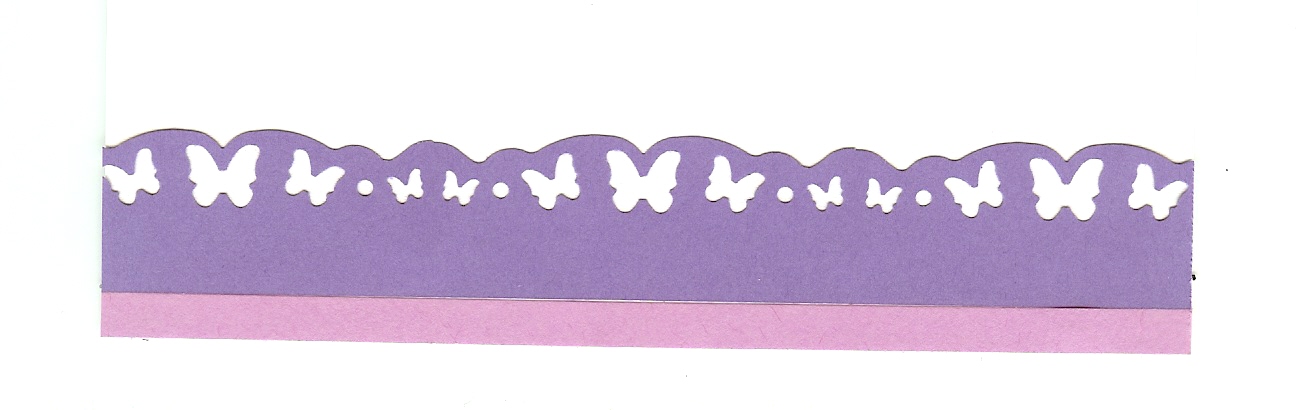
This is a very simple quilled butterfly made with ring coils. You can make a ring coil by wrapping a strip several times around anything round (ballpoint pen, the handle of a wooden spoon etc.) or you can use one of the many quilling templates  available. There is also a cute little item called a circle sizer which serves the same purpose as a template (it’s just smaller.) Once you’ve made your ring coils, pinch them into the shapes you want for the wings. Make a 6” marquis for the body, a 11/2” tight roll (squeezed into an oval shape) for the head, and a 2” open heart for the antenna. I used a new Fiskars butterfly border punch  on the card and glued the little “fall” butterflies around the ring coil butterfly. On the inside of the card I glued a strip of 1/8” quilling paper and a wider strip of colored paper which I also punched. 

The next card is made using a different technique. It is called alternate side looping. I used three strips for the wing and back half of the butterfly. The body is a 6” marquise. The head is a 1 ½” tight roll. The antenna is a 1” strip folded in half and both ends curled in the same direction. The daisy has a 3” tight roll for a center, flattened into an oval. The Petals are 6” teardrops. The stem is just a 2” strip finger curled with 3’ open coils on either side. Enjoy!


Friday, February 4, 2011

Another Quilled Heart

Have you made your Valentine cards yet? No? Well, here is one more Valentine pattern for you. Once again, I started with a lightly pencil drawn heart outline to follow. I then arranged 5” open S scrolls around the outline to be sure I could get the “fit” right. After gluing the S scrolls down, I added 2” tight rolls on both sides where the S scrolls meet. I added a 5” teardrop at the bottom of the heart. To finish the card, I used a heart border punch on both sides of the card and backed it with a contrasting color. I decided to do this card in pastels rather than the traditional red, I think it is too pretty to use just for Valentines Day. Enjoy!

FYI Heart border punches (the one shown as well as the circle heart punch and the heart corner/border punch) are on sale until February 11th)

Thursday, February 3, 2011

A Special Quilled Heart


I promised you a different kind of heart this week. This couldn’t be any more “out of the box” than our typical quilled hearts.This week I’d like to introduce you to Sarah Yakawonis. She contacted me after seeing the picture of the 3-D quilled scull that Kim Wallace sent me that was posted on this blog. Sarah said that she had done a two dimensional scull and would like to try a 3-D scull. I checked out her blog (http://yakawonis.blogspot.com/ )and was amazed at her anatomical quilling. I asked her permission to feature her here and share her work with you. She graciously accepted.

Sarah is a graduate of the Maine College of Art and works as a graphic artist in a publication design studio in Portland, Maine. “We make books, it's really fulfilling because I love everything about books.”


I asked her how she learned to quill. “, I learned quilling on my own. But I used the skills like flawless glue work from school. My teachers were really hard about stuff like glue showing, it taught me to hold everything I make up to a level of scrutiny I would have never know existed if I hadn't gone to art school. . . . I fell in love with quilling early last summer and played around with a lot of the traditional quilling motifs. While I did learn the techniques of quilling by doing this, none of the traditional themes held my interest for very long. I was looking for a subject that would. I guess I was looking for a something that was more macabre than the traditional flowers and letterforms. I came up with the idea of anatomical quilling while in the wilderness of Maine; it just kind of came to me like being hit by a lightning bolt of inspiration! I did a few pieces and knew I'd do a lot more. I really love repetitive tasks, and I enjoy how long each one takes. For example my quilled heart took about 33 hours to complete. Each part of the body is so complex! I love figuring out how to take the illustration I work from and translate it into quilling! It's so much fun and so satisfying to see the finished work!”

I asked Sarah if she planned to “market” her work, she replied,” I'm trying to figure out how to get my work into galleries. I'm preparing to approach galleries in Portland and nation wide, First Friday is a big art day in Portland so I'm waiting for gallery Curators to be a little less busy when I approach them. I hope it's a fruitful endeavor!

I may start selling them online, I'm looking for the best platform to showcase my work. I also have to figure out how to price my work, no small task when there is nothing out there to compare it to.

Be sure to stop by Sarah's blog to see some great close ups of her work. Good luck Sarah! I’m happy to have made your acquaintance.!

Friday, January 28, 2011

Valentine Pattern


Since Valentine’s Day is almost upon us, I thought I would share another Valentine’s pattern with you. This one is a white filigree heart with a bouquet of roses in the center. I started out by drawing (or tracing) a heart shape. I covered the outline with 6” marquises. The number you need will be determined by the size of the heart you draw. I used 34 including the extra six I placed at the bottom and top of the heart. When gluing the marquises down I start at both the center top and center bottom and then work my way up/down the sides of the heart. (The last inch or so before the sides meet I lay them in dry so I can make whatever spacing adjustments are necessary.) Next, I made enough 3” tight rolls to place on both sides of the heart everywhere the marquises meet; a very simple, but pretty filigree border.

For the bouquet of roses in the center I made tiny folded roses using 1/8’ paper. I used floral wire for stems. I dipped the end of the wire in glue and put in into the bottom of the roses and let them dry before I assembled them. Add a simple bow and you have a pretty card you could use for other occasions a well; anniversary, engagement etc.


I have also used a very similar border on a piece I did for a 40th wedding anniversary. Since the color for the 40th is a garnet/red, I made the roses using a deep red 3/8th” paper. I also placed pale pink buds in between the red roses and a pale pink rose in the center. The piece I sold also had a tiny paper ribbon with the couple's name and "Happy 40th Anniversary on it. These are my “trademark” roses; each petal is a separate piece of paper. Here is a link to instructions for the roses in case you are interested. Enjoy!


FYI My next post will be about a very different kind of heart.

Thursday, January 20, 2011

Meet Sandra White


This week I would like to introduce you to Sandra White, a quiller from New Hampshire. I’ve admired Sandy’s work for years. I used to sell some of my work through a shop in North Conway, New Hampshire. On my trips up there, (I LOVE the White Mountains and everything about New Hampshire . . . It has always been a secret dream of mine to live in a cabin in the White Mountains), I enjoyed poking around in the shops in and just enjoying being up there. I first saw Sandy’s work in a shop run by the League of NH Craftsmen. I almost missed it. They were pictures of birds and wild flowers (did I tell you I love wild flowers and have bird feeders right outside the Whimsiquills window?) The interesting thing about these pictures was the outline of the birds/flowers was cut out and the actual quilling was behind the cut out. Recently, I came across Sandy’s blog http://www.quillingbysandrawhite.blogspot.com/ and read about how she came up with this idea “by accident”. I contacted her and she has given me permission to share her story.


“I started quilling in 1973. I went to a craft shop and came home with quilling paper to frame and embellish my girlfriend’s wedding invitation. I made all kinds of tiny little flowers. When I went back to the craft shop , I showed the girl and she said “you didn’t even have a quilling tool!” She showed me the tool with the slot, I took it home and have not stopped quilling. It was so easy with the tool that I haven’t stopped.”

“In the mid 80’s …………that sounds so long ago………my mother-in-law Dona was making cut and pierced lampshades to sell in the League of NH Craftsmen shops with my father –in-law Dick’s turned wooden lamps…..very beautiful, I even have a couple.


We had thought that perhaps a little quilling on the shades might be pretty. So I made up some flowers and we tried to place them on the shade. We had envisioned that the flowers would show nicely when the lamp was turned on. But it did not. Instead, the flowers slipped behind a cut-out in the shade, and it happened to be that of a loon. And the accident was born. Quilling my way. When the lamp was tuned on, all you could see was a blob of something. But when it was off, the quilling showed very well behind the opening. That’s where the idea of quilling behind a cut-out was born. A happy Accident. So much for quilled lampshades…………I did make flowers for a few lampshades with Dona completing them. And I did sell a couple……………but my interest was in the birds and ducks…………..and on to wildflowers and other wildlife. Quilling, My Way, developed from that little accident……………I do have a lampshade with quilled flowers on it as shown below. I am unable, perhaps unwilling is a little more honest, to make any more, as I do not have any interest in making the shade itself. Too tedious ………like quilling isn’t tedious.”


If you would like to see more of Sandra’s work check out her web site http://www.quillingbysandrawhite.com/


Friday, January 14, 2011

Be my Valentine

Do you remember being in elementary school and making Valentines for your classmates? I do . . . I remember cutting out hearts from construction paper and decorating them with Valentine stickers. I remember my Mom helping me to make heart shaped cookies and writing classmates’ names on them with frosting. I remember buying “punch out” Valentines with cute little critters and cute little sayings. I also remember those awful tasting little candy hearts that said ‘be mine” or “love”. Too bad I didn’t know how to quill back then; I don’t make too many Valentines now . . . but here are some ideas in case you are planning on being creative this year.


The heart on this card was made with a technique called bandaging. I stacked 1/8” inch strips together (I think I used six) and then wrapped them with the contrasting color. I wrapped the bandaged strips around a cardboard cut out for the heart shape and removed it from the work board (and the cut out) once it was dry. The directions for the little “heart” petals follow.

6 Pink hearts (3”) for flower petals
Wrap red paper around three of the pink hearts
3 Red hearts (3”) for petals
3 Green strips (1.5”) for stems
3 Loose scrolls (2”) for filigree
Arrange as shown

For those of you who have visited my web site Whimsiquills.com , you know I like to use border punches when I make my cards. Here are some that are perfect for Valentines Day. Heart border punch I used for the bottom of the card, here is a Circle Heart Border punch.  , and last but not least "Framed in Love" a corner border punch. I hope these give you some ideas.


Thursday, January 6, 2011

Happy New Year!

Happy New Year! I hope you enjoyed the holiday season and are looking forward to a happy healthy 2011. It’s hard to believe it is January although the temperature and the snow on the ground are pretty good indications. I’m one of those strange people who love the winter! I actually enjoy walking my dogs more when it is 15 degrees out than I do when it is 85 degrees. So in honor of winter I created a new snowflake (no easy task when you have made as many snowflakes as I have over the years) This time I combined husking with traditional quilling, although I used a quilling comb (aka onion holder) instead of wrapping the strips around pins on a work board. In case you would like to try this one, I used the following sized strips for this snowflake

8 ½” strips for the “husked” arms of the snowflakes,

4” strips for the open hearts which I placed between the six arms of the snowflakes.

4” teardrops

2” tight rolls

 
Once again, I plan to feature other quilling artists, starting with Sandra White a New Hampshire quiller I plan to  touch base with some of the quillers I have already featured, just to see what they are doing this year.


For those of you who may not know, I have set up a Whimsiquills “fan” page on Facebook. (Just do a search for Whimsiquills/Facebook and the page comes right up).I thought it might be a fun way for us to have “discussions” about quilling topics. Two threads I have started include getting quilling into schools ( I have not yet been successful here) and making greeting cards. I hope you will stop by and add your thoughts and let me know what you are interested in discussing with other quillers.